
Stabilizing and Hooping Techniques
Hello embroidery enthusiasts! This month we will be exploring techniques for stabilizing and hooping for embroidery materials and embroidery projects. There are many different kinds of stabilizers, and many can be used in multiple ways. In this article, I hope that you will gain an understanding of what stabilizers are, discover why they are so important, and make sense of which stabilizer to use for the embroidery that you want to do!
Why Stabilize?
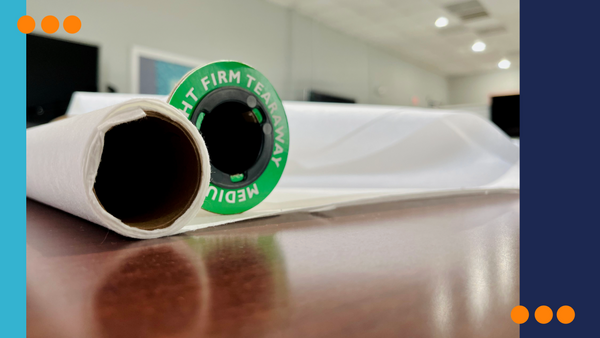
The picture above displays a roll of Medium Weight Firm Teraway Stabilizer.
Stabilizing is the foundation of embroidery. You will need to have a selection of Cutaway, Tearaway, and Wash Away stabilizers on hand to create various types of embroidery projects. The job of the stabilizer is to support the fabric or material that you are stitching onto AND to provide a great structure so that the rapid needle penetrations create stitches that are smooth, well defined, and secure in your project. Since the embroidery machine is doing a lot of the hard work of decorating for us, we need to choose a stabilizer that can help us get the best end result. There are lots of different ways to stabilize various garments, fabrics, and other projects, but my general rule of thumb is to use a stabilizer that preserves the drape and feel of the original material while providing perfect stitch support during the embroidery process.
I’ve got a Stabilizer Cheat Sheet for you to download to get you started, but if you will practice with different stabilizers, you will get a feel for what works and what doesn’t for the kind of embroidery you want to do. As in quilting, there are really no embroidery police, and if your technique WORKS and stands up to the kind of use that your project will encounter, then that’s the right stabilizer for the job.
Backings and Toppers
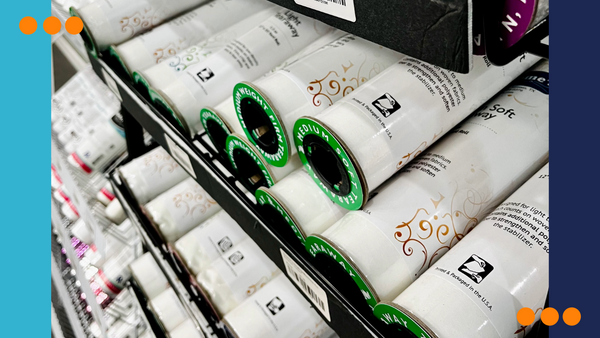
The picture above shows the current display of stabilizers available at Grome's Sewing Machine Company in Universal City, Texas.
Another quick note about stabilizers, in the stabilizer display area of the store, you will also find a subset of stabilizers that are meant to be used on TOP of your embroidery and these are called Toppers. You can find toppers that are washaway or heat away or even tear away (like sparkly Mylar topper film) but these are definitely meant for the TOP of your embroidery, not as part of the hooping process, so just keep that in mind when you are shopping. Toppers are usually thin and when unrolled, seem to resemble clear plastic wrap, the kind you might use in your kitchen. However, they are definitely NOT the same thing, as just as a reminder, plastic wrap for your kitchen activities is never suitable for use with your expensive embroidery machine. Be sure to stick with stabilizer and toppers that are specifically made for embroidery to avoid any unplanned visits to the machine emergency room.
Hooping Versus Floating
Hooped fabric is "hooped" along with the stabilizer in between the layers or sections of the embroidery hoop. This helps prevent the fabric from shifting while the embroidery is taking place.
Speaking of hooping, let's explore two main ways to hoop your projects. Of course we will be hooping the stabilizer, making sure that it is taut enough to get a nice “drum” like sound when you flick it with your finger. If your stabilizer is saggy or loose, it’s not going to give you the best results. Save time and materials (and your happiness at the machine) by practicing on getting a good hooping until you have that down.
Now, about the project material. You can hoop both the material that you are embroidering with the stabilizer between the parts of the hoop, so all the layers act as one structure under the needle, but some projects are hard to hoop. Some garments even need to be unstitched to get them flat enough to get under the needle and spread out flat. Christmas stockings, baby bodysuits, children’s t-shirts are all popular items that may need some fiddling to figure out how to get them hooped.
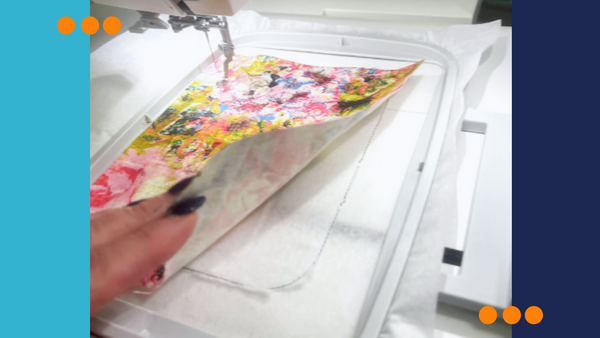
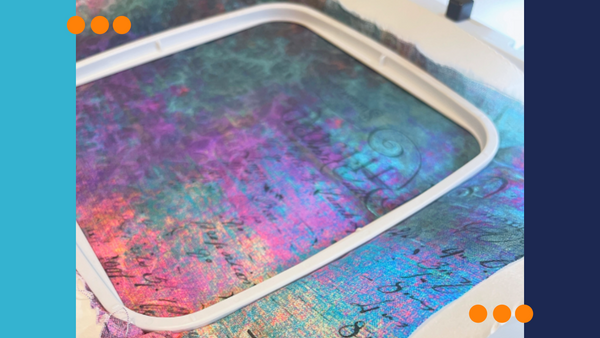
Floated fabric is laid over the top of the hoop once the hoop is placed on the machine with stabilizer. Your design instructions may ask you to float the fabric before you start any embroidery or the design may include a "placement stitch" that you need to cover by floating the fabric on top of it.
A technique that works better for these kind of items is called Floating, and it generally means that you aren’t securing the material between the parts of the hoop with the stabilizer, but rather laying the project on top of the hoop, and either basting it to the hoop, pinning it outside the stitching field, or using a special sticky stabilizer or embroidery safe adhesive spray, like KK2000, to temporarily “stick” the material to the stabilizer so that it will stay still long enough to embroider. Where there’s a will to put some embroidery on something, there is a way! You might need to try different configurations of hooping and stabilizing, but you might be surprised at what people have managed to embroider!
I hope you have learned some new things about machine embroidery stabilizers, and have maybe added a few new kinds of stabilizers to check out! Look at what you have in your stash, and then make a list of what you need to pick up. At the embroidery classes at Grome’s we explore different stabilizers in person so you can get a feel for what kind works best for your project, so consider signing up for the next Embroidery project class, too! You will learn a lot and will have a chance to shop the great range of stabilizers that Grome’s Sewing Machine Company carries! I’ll see you there!
XOXO,
Sheila Ryan for Grome’s Sewing Machine Co.
Bio:
Sheila Ryan is a San Antonio based embroidery enthusiast. She loves sharing projects and design ideas with embroidery machine owners and helping them develop their skills and passion for the many wonderful techniques possible with machine embroidery. When she is not busy digitizing new embroidery designs for her business Designs by Babymoon, you might find Sheila buried under a new quilting project or busy with other crafts like watercolor and mixed media painting. Sheila loves dragging out all the supplies and mixing things up to see what will happen. She hopes that you will fall in love with making beautiful things with her.
Links to Sheila's Facebook, Instagram, YouTube & Website
Thanks for Reading!
Thanks for reading Grome's blog. Please share this with all your sewing friends on Facebook and Instagram. WE WANT TO SEE YOUR PROJECTS!! Tag us on Instagram or Facebook and show us what you make with the new tips and techniques you learn from watching our videos and reading our blogs!
Grome's Sewing Machine Co. is a small business with a knowledge base of all brands spanning from 1950, so you can trust us with all your sewing, quilting, and embroidery needs. Grome's is a Certified Dealer of Pfaff, Janome, Juki, Viking, Singer, and Grace Frame Co.
Make sure to support small local business like Grome's by following us on our social media and visiting our website where you can join our email list for special coupons, sales, and information on classes and events.
Published on: 1/26/2024