
Intro to Embroidery
It can really be overwhelming after you pull your new embroidery machine out of the box and get it set up in your sewing room! After all, you just invested more than you may ever have on some really cool technology, and while you might have researched the machine for what you wanted to make, now that it is at home and ready to go, it can seem to just blink at you asking “now what?”
There are hundreds of kinds of projects that you can do with your embroidery machine, even beyond adding names or monograms to “all the things”. Each type of project seems to have different techniques and different supplies and before you know it, this rabbit hole has swallowed you (and your space) up! So let’s break down what the most basic necessities are for most embroidery projects; that way you have a clear sense of what you might need to get started.
 The Magic is in the Thread
Most of the magic with your embroidery machine is made reality by stitching with the perfect thread for your project. In the past, Rayon threads were what was most commonly available for machine embroidery, but rayon can bleed or fade, and new technology has paved the way for gorgeous polyester threads that can mimic the shine of the traditional rayon threads.
Polyester is also stronger and is generally very washable. This makes polyester thread perfect for applications that get a lot of use, like things for kids, or embroidery on heavy use items such as kitchen accessories. And as a bonus, polyester thread comes in other finishes like matte, metallic threads (to add luxurious sparkle), and even glow in the dark and neon threads! And, other than the most used 40 weight thread, polyester can even come in lighter weights such as 60 weight which is perfect for doing tiny lettering. With so many types of threads at your disposal, I promise that your thread collection will quickly become a literal paintbox of colors for you to use in your embroidery art.
 The Foundation to Every Embroidery
One interesting thing about using an embroidery machine are the different ways that the material you are stitching on needs to be supported so that it can accept the stitching from the machine and give you the most beautiful finish. To support your stitching you will need a good selection of stabilizers. These foundation materials are crucial to embroidery success, and there are different types of stabilizers all used in different ways.
 For example, there are cutaway stabilizers that range from very lightweight and sheer to strong and heavy for supporting knit fabrics like polos and t-shirts and that will remain in your stitching for the life of the garment (go ahead and take a peek inside the logo area of your favorite name brand polo to get a peek of the stabilizer that is still in there!). Tearaway stabilizers can mostly be carefully pulled away from the backside of your stitched area for supporting fabrics that have a little more structure - like woven cotton, canvas, and denim. You will also want to pick up some washaway stabilizer for both topping your fluffy fabrics like terry towels and robes to help the stitches stay on top of the pile, or stronger washaway mesh stabilizers that look more like a mesh that you might use when stitching up patches or freestanding lace projects.
Special Snips for Fiddly Bits
Did you know that there are special scissors that make doing some of the fiddly parts of machine embroidery so easy? If you decide to do any applique on your embroidery machine, you will find that special curved scissors make trimming your appliques while they are hooped on the embroidery machine so much easier! My personal favorites are the Kai double curved embroidery scissors that are available with both sharp tips and blunt tips. And then tiny snips help trim any thread tails or jump stitches so nicely because they can get into areas that your regular sewing shears cannot. These tiny snips always seem to migrate, but they are fairly inexpensive, so I have a couple extras floating around so that they are always within arm’s reach.
 A Great Place to Start Practicing
Let’s think about all the kinds of projects you can now create with your embroidery machine. Of course you will want to start embroidering what you already have at home (adding your family name or a beautiful initial to your bath linens or pillowcases is a great place to start!) After you have monogrammed all the towels and aprons that you might have, you might be interested in adding embroidery to a purchased tote bag or apron. You can keep it simple or get it as fancy as you’d like!
Other than home decor items, many people enjoy adding embroidered blocks in their quilting and beautiful motifs to their garments. Using some of the built in designs on your embroidery machine is a great way to see just what your embroidery machine is capable of! You can add just a little embroidery by creating a custom quilt label for the back of your quilt, or make fantastically stitched blocks for a stunning statement in your quilting. Lots of people are finding that doing edge-to-edge quilting right on their embroidery machines is a really great way to get some of those unfinished quilts all the way done except for the binding (now wouldn’t that be a great machine for someone to invent!) There are also lots of ways to “quilt as you go” using your embroidery machine.
But wait! There’s even more! What about In-The-Hoop projects? That’s an embroidery machine project where you actually build a finished “thing” like a purse or a luggage tag or even jewelry right on the embroidery machine! You can even find embroidery patterns for home decor banners, stuffed toys, and wearable lace elements to incorporate into your wardrobe! In-The- Hoop projects are my personal favorite because we can let the embroidery machine do all the hard work of doing precise stitching and all we have to do is trim things out and occasionally add a bit of hardware!
Once you start your embroidery journey, there is no telling where you will end up, but it’s a thrilling adventure for sure! You are going to be making beautiful things in no time at all! I’m excited to be bringing some really fun embroidery classes to Grome’s this year and I hope that you will join me. Be sure that you are signed up for the Gromes’ newsletter and follow along on social media to hear about classes where you can learn new ways to use your embroidery machine and stretch your skills!
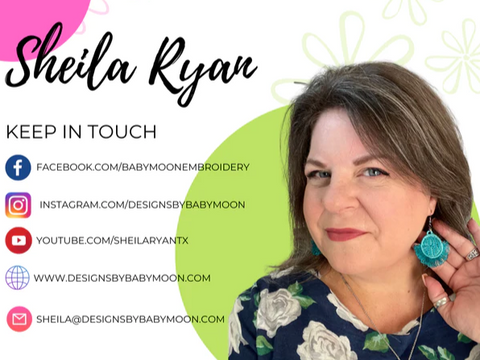
XOXO, Sheila
Bio:
Sheila Ryan is a San Antonio based embroidery enthusiast. She loves sharing projects and design ideas with embroidery machine owners and helping them develop their skills and passion for the many wonderful techniques possible with machine embroidery. When she is not busy digitizing new embroidery designs for her business Designs by Babymoon, you might find Sheila buried under a new quilting project or busy with other crafts like watercolor and mixed media painting. Sheila loves dragging out all the supplies and mixing things up to see what will happen. She hopes that you will fall in love with making beautiful things with her.
Links to Sheila's Facebook, Instagram, YouTube & Website
Thanks for Reading!
Thanks for reading Grome's blog. Please share this with all your sewing friends on Facebook and Instagram. WE WANT TO SEE YOUR PROJECTS!! Tag us on Instagram or Facebook and show us what you make with the new tips and techniques you learn from watching our videos and reading our blogs!
Grome's Sewing Machine Co. is a small business with a knowledge base of all brands spanning from 1950, so you can trust us with all your sewing, quilting, and embroidery needs. Grome's is a Certified Dealer of Pfaff, Janome, Juki, Viking, Singer, and Grace Frame Co.
Make sure to support small local business like Grome's by following us on our social media and visiting our website where you can join our email list for special coupons, sales, and information on classes and events.
Published on: 1/16/2024